Tuesday, August 24, 2021

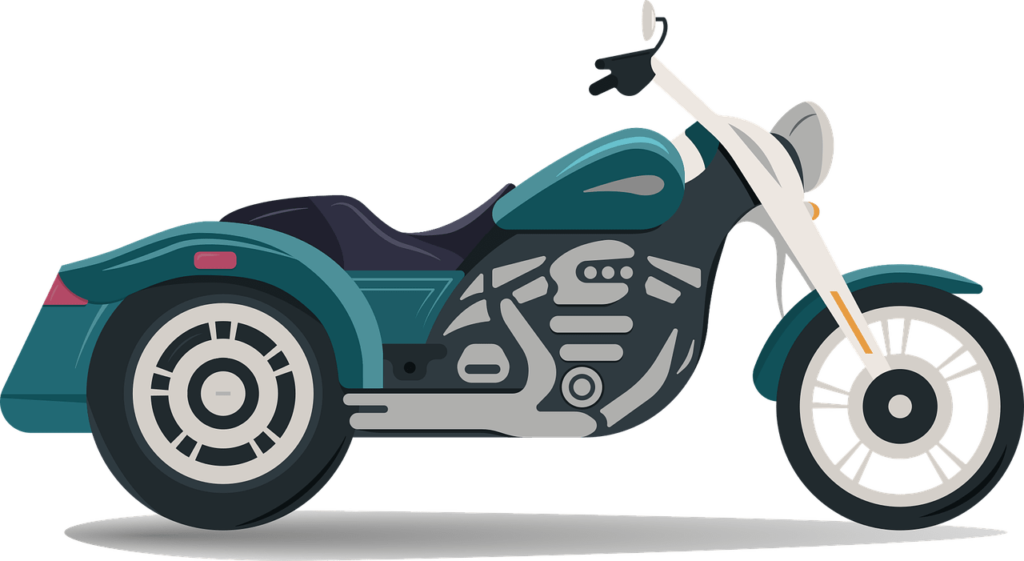
Taking care of your Motorcycle


With it comes to motorcycles, your little care or maintenance could save you a lot of money and help keep your motorcycle in better condition for years to come. Taking care of your motorcycle is necessary to keep your bike in a better shape, so you can enjoy your ride comfortably and without issues. Also, a motorcycle in a good condition is a safer bike for you.

Taking care of your motorcycle doesn't simply mean keeping it looking good. Experienced bikers always take this opportunity to guarantee that their motorcycle is also actually up to speed. While you're taking care of your motorcycle, you can undoubtedly spot loose screws or bolts, engine leaks, rust film on chrome parts, worn or chafed cables, and damaged seats.

Before getting ready to give your motorcycle a proper care, you need to find an appropriate place for the work, since you're not really allowed to do it in your back yard or on the road. If you utilize a high-pressure cleaner to clean your motorcycle, hold it a safe distance from delicate parts like the steering head bearings, chain, wheel bearings or swing arm bearings to prevent flushing out the grease.

It is very important to remember that before washing, always allow your motorcycle to cool down before washing. When your motorcycle is gleaming again, it's great to do some technical checks. Are all lights working appropriately or if your motorcycle seat needs a replacement? For that you can seek the help of expert service like the company offering maintenance services and seat covers for bike.

Likewise check the oil and coolant levels, drive chain thickness of the brake pads, track depth and tire pressures. Always follow your motorcycle manual for regular maintenance and check-up information.

Here are some best tips to take care of your motorcycle-:

Change the oil

To keep your engine running appropriately, you'll need to replace the oil after a few thousand miles, just look at the owner's manual to find out how frequently. To start, you'll need to ride the motorcycle for around five minutes just to warm it up. This brings down the viscosity of the oil so it will drain easily. With the engine off and the motorcycle standing upright, eliminate the drain plug just as the oil fill plug, allowing the oil to escape into a drain pan. To reach the drain plug you may have to remove some fairing.

Likewise, take out the oil filter. Just be careful as this process can get messy. Try covering the engine as well as exhaust area with aluminum foil to secure against drip page. Once the oil is depleted, install another oil filter, put back any parts you had removed, and refill utilizing a funnel and the appropriate type and amount of motorcycle oil, as mentioned in the owner's manual. Replace the oil fill cap and reuse the used oil at a motorcycle shop.

Maintain tire pressure and tread

To check a tire's pressure, find the valve stem within the wheel, remove the cap, and press an air pressure gauge onto the valve stem. Compare the pressure and what it should be, that data will be written on the sidewall of the tire. Utilize an air compressor accessible at numerous gas stations to fill the tire. Let out some air on the off chance that you over-inflate.

Replace the valve stem cap when done and to see how your tread is doing, check the tire's wear marker (it is a little rubber knob that resides in the grooves of the tire). On the off chance that the knob is at the very same level of rubber that meets the road, it's time for a tire replacement which is a job for a professional mechanic.

Cleaning leather motorcycle seat

When it comes to taking care of motorcycle, it is important to clean and condition the leather motorcycle seat frequently. Since it is so porous, leather attracts in dirt, dust and other debris from the road. The grime will seep into the leather, frequently without you noticing until it's too late. This can make the leather crack and to dry if it isn’t appropriately maintained. Start by gently dusting off your leather to remove any dust and dirt. After that spray the leather cleaner onto the leather and delicately wipe the bike leather down utilizing a clean cloth. Then again, you can dip a cloth in the cleaner and utilize the cleaner-moistened cloth to rub down the leather and remove stains and dirt.

In circular motions rub the leather, adding some extra elbow grease to areas that seem stained. But don't rub or scrub too hard. Allow the motorcycle seat and other leather dry normally. Try not to utilize a heater to speed up the drying process. If your motorcycle leather seat is beyond care then it probably better to repair it from the company offering leather car seat repair in Oshawa, Ontario.

Drive chain

The drive chain transfers the power from your motor to your back tire. Without proper care, it tends to be risky. While chain is still warm, it's a decent practice to lube your chain after each ride. This allows the oil to enter all parts of the chain. What's more, check the chain pressure. The right pressure prolongs the life of your motorcycle.

Your motorcycle is your valuable investments so don’t take it for granted. Be cautious about it and take proper care of your motorcycle. If the feeling of the ride changes or you begins to hear changes in how the engine sounds, don't neglect those signs. When you see the warning signs of a potential problem, take action or take it to the company offering bike maintenance services.

Saturday, July 3, 2021

How do you fix a falling headliner?

A headliner, or also known as headlining, is a fabric that is secured to the roof framing. It gives the vehicle's rooftop a smooth texture, absorb noises, and keep a pleasurable interior temperature by buffering the outside heat and cold. After long-term period and because of bad weather conditions, the fabric may become loose and fall from its backing board. This condition is also known as falling headliner, which you at times can't avoid repairing since it gets in the way.

A headliner is one component that can fall over time. You may wonder what can cause a headliner to fall? It might be that you own an old vehicle, or you are a type of person that neglects maintenance, or that you expose your vehicle to the sun for long period of time. The sun is beneficial for your health but not for your car. In the event that you keep it standing under the sun unprotected your car's headliner can fall.

A falling headliner can be a worst thing you ever want, and costly to repair. The headliner is the fabric part attached to the roof of your car so the falling may also occur because the condition of the glue that holds it to the backing deteriorates after some time. This situation can happen fast if the headlining gets wet. The glue will get moist and will dissolve. The greatest disadvantage of glue is that when it comes in contact with heat, it loses its potency. Cars that are exposed to very hot heat may get a falling headliner sooner than others. The fabric can get separated from the supporting board and damage the overall beauty of your car's interior. Sometimes the glues get so bad that it gets in the way, so you can’t avoid not fixing it. You can replace your old headliner with a new one however that is definitely not a reasonable choice since headliners along with their backboards are very costly.

The total cost may equal to that of buying a car. Thus, even if you want to, you would not replace it. It is suggested to get your headlining sorted professionally by the company offering seat covers in Oshawa, as to not harm your car at all, however, sometimes you may simply need to get your falling headliner sorted cheaply and quickly. Luckily, there are other ways to fix a headliner that are more practical and cheaper. Here are some tips that can help you fix a falling headliner:

Gluing the Headlining Back In Place

Gluing your headliner back is the most obvious choice for car owners. However, it's not always the simplest method and there are some things to consider before starting this process. Most importantly, you should possibly try the glue method when you first notice your headliner starting to fall. If you can stop the process early and get any falling part stuck back in place with glue, you can head off a lot greater issue before it begins.

The outer layer of your headliner would have been glued in place, initially, and over time, that glue will separate. While any part of your headliner may fall, it normally begins around the front of your vehicle where the top of your windshield meets the roof. This part exposes to the most UV rays, so it's often where the falling will start. In the event that you notice this part of your headliner beginning to fall, head to your local auto parts store and get a can of headliner adhesive.

Using Thumbtacks

The thumbtack process for re-securing a falling headliner is undoubtedly the unattractive process, however in case you're simply hoping to get your headliner back in place in a rush, it's presumably the quickest and least expensive process for fixing falling headliners. There's actually no special method behind this specific process. Simply stock up on few thumbtacks and start fixing your headliner back in place.

Keep in mind, you should have a center layer of cardboard or some other similar material in your headliner’s construction, and you'll pinning your outer fabric to this middle layer. On the off chance that you need to add a bit of style to your repair, construct a pattern out of your tacks. However, other than that, this one is a pretty normal fix.

Utilizing Staples and Hair Spray

This may seem to be an extremely surprising method however there is proof that this works. With a stapler properly staple the headlining back on its backing board. You would require a stapler gun obviously, as a conventional paper stapler will not actually work. Whenever that is done spray the headlining with hairspray and let it dry. After it dry, remove the staples. If you're searching for a cheap, but semi-permanent fix this process might be one to consider if you have a car that is too old to even think about putting lots of money in.

Utilize double-sided tape

The tape is a remarkable invention that can assist you with nearly everything. You can utilize it to make a quick fix almost anywhere in your home or in your vehicle. A falling headliner can likewise be fixed utilizing a tape. You should simply purchase twofold sided tape. The twofold sided tape will stick to the rooftop's edge and to the fabric making it stick firmly back. This method is helpful on the off chance that you have extensive damage on the edges.

Regardless of what method you pick, it should be your responsibility to inspect the affected part first. Depending on the extent of the fall, you can pick the best method from the list above. In any case, you should remember that all these are quick fixes, which means that they can fail as soon as possible. When you see the first sign of fall, you should begin saving money for a permanent fix by company offering convertible top in Oshawa, Ontario.


Tuesday, June 15, 2021

How to take care of your car upholstery?

If you have quite recently taken your car in for new upholstery from the company offering car seat covers in Oshawa, Ontario you might be thinking about how you can take the best possible care of your car upholstery. Particularly if your car is a special model with specialized upholstery, it's necessary to take proper care and perform routine cleaning to keep it looking new and sleek, regardless of how frequently you take it for a drive.

Like many areas of car care and maintenance, how to take care of your car upholstery is an area filled with so many various strategies and options that a lot people such as yourself feel stressful at the very thought. So day after day goes by and the only care your car's upholstery ever gets in the best of situations is a quick clean work. Yet, quick cleaning your vehicle's upholstery is simply going to go so far in removing dust and dirt that will accumulate within your car’s upholstery.

Ultimately you should find some tips to take care of your car’s upholstery, never neglect the interior of your car, and do some deep cleaning. Car owners or any other vehicle owners who value their vehicles may benefit by learning the proper way to take care of their car upholstery. Any person who has kids or spends a lot of time inside their vehicles sees how messy car upholstery can get in a short amount of time. The best effective tools, solvents and techniques are regularly the highest needs identified by the leading brands in the automotive industry to take care of your car upholstery.

Knowing that different upholstery materials require different cleaning process is likewise incredibly significant for maintaining the quality of your car upholstery. Here are some the tips to take care of your car upholstery-:

Know the Basics and Move Forward

Taking a quick look into the interior part of any car will quickly reveal the numerous materials, surfaces, and fabrics that make up any car interior. Upon first look, how to take care of your car upholster within your car is a tiresome task for a lot of people. Regardless of your immediate nervousness and fears, cleaning the inside of your vehicle is far simpler and easier than your family, friends, and relative know-it-all has lead you to believe. The car upholstery manufacturer would have you believe that how to clean car upholstery you would require different cleaners. One particular cleaner after another. But it is not obviously true, you can simply clean your upholstery without any expert cleaners.

With proper knowledge, everything will be easier and simpler. If you have spilled espresso or soft drink in your vehicle while driving, you probably know it very well may be difficult to stop and quickly deal with a spill. In any case, to secure your car's upholstery and prevent a stain, it's important to leave some place protected and tend the spill as soon as you can. Try not to rub at the spot with a dry cloth. Instead, weaken the spill with cool water and afterward utilize a clean cloth to blot the spot dry.

Tips for Tricky Stains

Some stains take some extra work to remove from upholstery. Standard glass cleaner is a good tool to use on tricky stains. In the first place, test the glass cleaner on a small, somewhat hidden spot. In the event that your upholstery isn't harmed, you can utilize the cleaner on stain. Make sure to allow it to set for around five minutes before blotting it away. Ink stains can be particularly hard to remove. In the event that there is ink stuck in your car carpet or convertible top, you can utilize hairspray to lift the stain away.

When rinsed away with dish cleanser and water, baking soda can do something amazing for vinyl upholstery, cleaning it with making it go stiff. Additionally, leather upholstery is delicate to specific cleaners and water, so make sure to allow your leather to dry completely on the off chance that you have cleaned it.

Caring for Vinyl and Leather Upholstery

Numerous car features leather on the seats and surfaces containing color that wears away with time. Thin layers of wear or fading color might be treated with cleaners and conditioners that are particularly designed for leather. Maybe when the leather starts to wears out or crack completely, the whole seat cover ought to be replaced. It's likewise beneficial to be cautious around the sewn stitching holding the leather upholstery together, particularly with the steering wheel. When rubbing the area with the suitable product, on the off chance that it doesn't seem to make any improvement, that section of leather may as of now be worn out or too faded.

If so, try leather dying on the fading spot or the whole area can be replaced. For a more thorough cleaning, consider utilizing a toothbrush with soft fiber to help get out the dirt and grime still trapped in leather grain. This can be done by applying the new toothbrush in a round motion gradually over the leather surfaces found all throughout the entire interior.

Anything you plan to use as a stain remover should be tried first. The last thing you don’t want to do is ruin the upholstery you're planning to clean. To test, just utilize your cleaner on an area of the upholstery that isn't apparent. Try not to utilize the stain remover if it leaves any damage or marks. Just use something different.

To stay away from any serious mistakes or mishaps, it's best to seek help form the company offering seat repair in Oshawa, Ontario. When the car upholstery cleaning is done properly, this can help the dirtiest and oldest car look new for the long period of time.


Saturday, June 5, 2021

Where to find aircraft seat in Oshawa?


Your aircraft probably has seen a lot of wear and tear throughout the years. Regardless of whether you haven't owned the aircraft for long, it's likely your seats have taken the brunt of the punishment and been damaged. Small tears or spills can make aircraft seats look worn even when the rest of your aircraft is in like-new condition. Luckily, there's a cost-effective choice that will stop those worn-out and uncomfortable seats. Seats are a crucial and slightly neglected part of every aircraft. It is the part that makes an aircraft pilot and their passengers feel comfortable, while carrying them to every one of the places they want to visit.

Aircraft engines accomplish the carrying part, however they absolutely don't make you feel comfortable. Similar to the case with couches and chairs, the material covering your aircraft seats wears out, which means that eventually you need to change it. Be that as it may, unlike any other furniture, you can't push an aircraft seat to the side of a room, you need to fix it. Aircraft seats come in numerous varieties. But the main question here is, where can you find comfortable and durable aircraft seats in Oshawa?

In Oshawa, you can find the company offering leather car seat repair in Oshawa, Ontario that likewise offer aircraft seats as well. There are different companies in Oshawa that offer aircraft seat, so you should do your research properly. You can check the company’s reputation and reviews of their past customers. But is it only up to finding the company that sell aircraft seats? No, you should know more about your aircraft seats so that you choose the one that won’t make you regret in future.

As said before aircraft seat comes in different varieties. Certain fabrics of aircraft seat are all about durability and ease of cleaning, while others are more about comfort and style. Picking the right aircraft seat can make a huge difference as far as operating aircraft enjoyment is concerned. So, before you pick a new seat for your aircraft or purchase, see what every fabric has to offer. Here are a couple of popular sorts of seat to look over:

Leather

There is a lot to like about leather aircraft seats. Most importantly, leather presents a refined look that shows durability. The style can work for any aircraft and will outlast cloth fabric when appropriately maintained. Leather likewise has an adaptable design that allows it to be firm and soft depending on the aircraft owner’s choice. Despite the fact that leather costs a bit more than any other fabric, the cleaning process is not nearly as complicated.

Basically wipe the seat down with Aircraft upholstery cleaner, vacuum and afterward just wait for the leather to dry normally. Leather conditioner is often a good idea on the off chance that you need to protect the fabric.

Faux Leather

Faux leather delivers every one of the amazing qualities of leather without the expensive cost. The most well-known kind of faux leather is made out of plastic. It's adaptable in the way that you can basically get any design you need because no animals are ever harmed in the process.

Faux leather is not difficult to clean and is unbelievably durable. However, unlike real leather, faux leather doesn't have a similar gloss. It doesn't smell or age a similar way either, which is a bad point for your aircraft.

Vinyl

When many people think of vinyl, they think of “record players.” While those don't actually sound comfortable, however the material people know as vinyl can be molded and utilized for many different purposes, including aircraft seats. Vinyl is not so difficult to clean, long-lasting (more than ten years) and durable. In case of leather it tends to get softer throughout the years, but same cannot be said in case of vinyl.

Vinyl gets harder which can make things somewhat less comfortable. Another regular criticism with vinyl is that comfort isn't ideal for hot days or cold weather. That being said, quality vinyl might be a reasonable choice to leather since it feels basically the same.

Nylon

On the off chance that you need durable aircraft seat that is likewise available in numerous patterns and colors, then nylon is the best choice for you. Fit for resisting UV rays and everyday wear and tear, nylon is outstandingly resistant to stains and is not difficult to clean. Nylon is additionally waterproof, which makes it a popular choice for those who are worried that the water may damage their seat. That being said, while practicality makes nylon a decent choice, it lacks in comfort.

Those are some of the popular fabric available for your aircraft seat. Your aircraft seats, regardless of whether they're for your group or your passengers, are a crucial part of your plane. It's important that your aircraft seats provide comfort to everyone on board so they can enjoy each flight without any problems. Comfortable seating likewise reduce stress, keeping your crew in top flying condition and assisting your passengers with arriving at their destination feeling refreshed. A good aircraft seats additionally improve the look of your aircraft’s cabin.

Aircraft seat can change the interior of your plane from old and worn out to attractive and modern. The interior of your plane can be the place where you make a positive first impression. Whatever your needs are, companies offering seat covers in Oshawa, Ontario can help. They specialize in aircraft seat repair, refurbishment and overhaul. Their complete design, certifications services and engineering allow them to meet very specific customers’ needs. Because of their good reputation, they are certain that you will be satisfied with their aircraft seat and repair.

Sunday, April 11, 2021

Why you must change your old boat upholstery?


The best thing of having a boat is to ride out on the water with your family or friends and have an enjoyable time. Anyway being out on the water moreover makes your boat upholstery tear, wear, and old. At the point when it's time to change your old boat upholstery, you need to replace it with the good one. Boat upholstery is exposed to all sorts of weather and environmental factor more often than not. Unlike any vehicle upholstery they are always out in the open, being exposed to sea water and sun radiation which will directly harm the upholstery.

UV rays from the sun does the most harm to boat upholstery which destroys the properties of upholstery fabric and also cause sewing to fail. At the time when this happens then the inside design of the upholstery can get damaged and the foam fills up with water which damages it after a few months of exposure. After this the plywood base absorbed salt water and the overlay breaks as the glues are harmed and this will make the boat upholstery absolutely unrecoverable.

When you get a tear or a hole in boat upholstery and when your boat upholstery is old, it is recommended you replace it as soon as possible to avoid any other harm. When it comes to replacing your boat upholstery, choosing the right vinyl fabric for the replacing task has an important effect. If your boat upholstery has little holes, you can repair it with right equipment and you can also take your boat to the company offering boat seat covers and repairs in Oshawa, Ontario in case you feel it is best to repair it professionally.

If your boat upholstery is old and can’t be repaired even with professional help, it`s best to replace it with a new one. In case the upholstery can be repaired, you should always use the right upholstering equipment which is available in your nearby boat shop or online. Basic information on boat upholstery is similarly an unquestionable requirement for repairing as well as for replacing. If you want to pick best fabric for your upholstery, Marine vinyl fabric is the best choice.

Marine vinyl fabric has a higher level of protection against any exterior harm compared with other various boat upholstery fabrics. Here are a few tips for changing your old boat upholstery with a new one-:

Get the right kind of vinyl fabric for your boat upholstery replacement

Marine vinyl remains in good working condition in a climate that would commonly make other upholstery to deteriorate within a brief period of time. It is totally dependable, durable and will last through various cleanings and wearing process. Marine vinyl fabric works wonderfully resisting the open environmental harms. It prevents color blur and breakdown from the sun since it is UV safe. It also resists bacteria, dampness, and mold. Static and stain blocking properties additionally makes it's surface safe and clean.

You can also find other kind of vinyl fabric in the company offering boat seat covers in Oshawa which likewise has it`s own benefits and features.

Check the plywood and foam in your boat's upholstery

Similarly as crucial as using the right replacement vinyl for your upholstery is guaranteeing the plywood and foam under the fabric is good in shape. Often the foam can be reused, anyway in some cases, for instance, serious water harm, the foam should likewise be replaced. In case you are replacing the foam, it's best to use one that has an open cell design. This allows water to deplete before mildew and mold can even form. Some foam has antimicrobial properties as well. If you're not using marine grade foam, seam sealer can do a good job of keeping water out of the foam.

Furthermore, check under the foam to make sure that the plywood is also in good condition. If that plywood is harmed under the current foam, it should be replaced since the harm will make space for water to leak in and cause damage. Simply ensure that your new plywood is marine grade, since marine plywood uses wood and paste which is waterproof.

Smooth out the process for replacing boat upholstery


You are likely considering throwing your old boat materials since they are presumably the old ones, what`s the use of it since you are going to buy a new one, right? Yet, don't do it in hurry as your replacing task is really smooth by using old plywood and vinyl for design proposes. Use chalk to mark the size of the old fabric on the new one for the vinyl. Plywood can be used as a layout as well. Put the old plywood on top and pencil the diagram as the particular size to be cut. Foam is the primary material that should not be designed after it. Or maybe, use the plywood as a layout cutting the foam 3/8th of an inch bigger than the size of the plywood.

Remember that because of its thickness boat vinyl always requires the usage of an industrial sewing machine. Make sure that your sewing machine can deal with upholstery, just like the manufacture. Else you risk damaging your machine during the process of changing your old boat upholstery into new.  It can take a certain level of skill and patience to replace your old boat upholstery. There is no harm in paying someone to do it in case you're short on time or have lack of skills.

Nonetheless, when you talk with different upholstery installers, ensure that they've worked on different boats. It's altogether different upholstering a vehicle seat or sofa compared with a boat. Unquestionably, experts have the experience and capacity to manage a wide range of fabric items for your boat upholstery. If the boat upholstery company has been around for a long time, like the company offering boat repairing in Oshawa you can be sure that they have gone over upholstery replacing task previously and will replace your old upholstery perfectly.

Wednesday, March 31, 2021

Taking Care of Your Car Headliners


Many car owners probably never paid much attention to the roof of their vehicle since they didn't have the need. In any case, despite the fact that it isn't so small, the headliners is frequently ignored when cleaning the car's interior. Just think about it, how frequently did you try to wash it, and do you even know how to take care of the headliners? Or you simply leave it to professional, like the company offering car headliners service, to repair your car headliners.

You may probably think that if you don't touch it, it can't get dirty, right? The car headliner is like the roof of your home. You don't regularly get in contact, however somehow it gets dirty over the time, particularly if you're smoking inside, or you have killed some bugs and left a stain. It simply should be somewhat refreshed from time to time. Other than the obvious purpose of protecting passenger and covering the metal rooftop, car headliners are crucial for several reasons.

Car headliners contribute to the vehicle's protection, keeping the cool or hot air inside so that when heater or AC is turned on, their effect is more noticeable. On the off chance that you need your car to shine outside and inside to enhance it`s beauty, you should figure out how to take care of your car headliner, so here are some tips on how to take care of your car headliner.

With regards to cleaning, there are various sorts of "issues" or stains you may need to manage. It isn't something similar if you utilize your car just for city driving or off-road driving, also on the off chance that you smoke cigarettes inside while driving through the cities routes. Cigarettes may help you lower down driving pressure or driving stress, however smoke is one of the worst enemies of all materials utilized for car headliners.

There will be a lot of things you'll find out about your vehicle, from replacing a punctured tire to changing the parking brake and adding brake fluid. Yet, keeping it perfect, not just from the outside, should be among your priorities from the very beginning because there's actually no theory behind it. This is something you as a car owner can and should do.

However, you must be careful of how you take care of your car headliners since you would prefer not to damage it. Follow the below process carefully-:

Spot Cleaning Minor Stains

On the off chance that there's just a spot or two covering a small area, utilizing a microfiber fabric and suitable upholstery cleaner could be sufficient to remove the stain quickly.

l  Start by trying to wipe the spot with a microfiber cloth and gently brushing it. Avoid any pressure since you would prefer not to push the dirt more in-depth into the upholstery. If you figure out how to wipe it this way, you're all good.

l  If that didn't work, the following step is to add the cleaner. You apply or splash a small amount directly to the material, not to the upholstery. And afterward delicately start cleaning the spot, without immersing too deeply into the foam. Wait it to completely dry, so you can inspect whether or not you managed to wipe it totally.

Clean Headliner Surface

You'll need to clean a bigger surface, and here's how you should do it:

l  Evenly spray the whole surface with suitable upholstery cleaner. Foaming cleaners have the ability to break dirt trapped just a little bit below the surface, which is the reason they are typically the best solution. Take a look at the container to perceive how long you should allow it to sit and wait for it.

l  After the time has run out, take a shuddered brush, and go over the whole surface. It is important to brush each section because once everything dries, there may be a noticeable difference between the brushed and not brushed parts.

l  Now you should allow everything to dry. Depending on the amount of cleaner you applied, it should require an hour or two for this process. Be that as it may, if even this didn't help, and there is still some noticeable dirt, it very well may be expected to repeat this whole process once again.

Remove Bad Odor from Headliners

Other than stains, car headliners will in general hold awful smells, and nobody wants that in its vehicle. Nonetheless, the people who smoke will without a doubt understand what this is about, so here is a quick solution on a mixture that will help you remove awful odors. You can utilize this routinely as a precaution measure that will likewise slow down the process of creating those awful smoke stains.

Here is the thing that you'll need to mix up for this small DIY project:

l  Microfiber cloth

l  ¼ of white vinegar

l  Some drops of any essential oil for smell

l  One tablespoon of baking soda

l  1 cup of water

Empty this mixture into a spray bottle and shake it well. Spray the solution onto the material, and afterward delicately dab it onto the headliners, while trying not to over-saturate it. Try not to apply this mixture directly onto headliners since it could soak them and lead to mildew. When it dries, go over the whole surface with a vacuum cleaner to eliminate any remaining parts of baking soda.

Aside from style, your car headliners do a lot to reduce outside sound and protect you from the heat and cold. Shockingly, it likewise gathers stains and odors. On the off chance that you know how to take care of your car headliner, you can restore the appearance of your ride and even help your car smell fresher. Surely, a little effort can make your car look good but if you don`t have enough time to focus on this kind of stuff, you can simply ask the help of professional from the company specializing in car repairing. They will get your job done surprisingly in a better way than simply doing it by yourself.

Monday, March 22, 2021

Change your car convertible top with your own choice


When you are a convertible owner, you certainly love your car very much, and taking it out on the street gives you a lot of satisfaction. Yet, when your convertible top is showing damage and getting old, in the event that you don't have the budget to invest into the best quality replacement top available on the market that can be quite troublesome. But you don`t always have to choose the one that is the most expensive in the market when it comes to convertible top, you can simply change your car convertible top with your own choice.

Numerous convertible owners are looking for a budget-friendly way to change their convertible, regardless of whether they plan on keeping their car forever, or whether they want it to look like new to sell it for a new one. Despite this explanation, if you want to change your car convertible top with your own choice within a budget, here are a couple of ways you can manage the cost and get your precious car a new convertible top. But before that, you must choose the company that offers the best convertible top options, like the company that offers car best convertible top. And after that you can simply follow these tips to change your car convertible top with your own choice-:

Material

One way to make your choice a better one is to think about alternative materials for your replacement convertible top. Numerous convertible tops are available in a variety of fabrics that vary based on thickness, vinyl vs. cloth, soundproofing and other different factors. This converts into options for your choices according to different budget levels and can allow you to manage the expense off of your replacement convertible top by picking a material that isn't as thick or soundproof as another. A few fabrics can be less expensive than others, even when the rest of the top is somewhat similar, so this is an incredible way to manage make your choice even better of your replacement convertible top project.

When buying from convertible top providers, you can find the list of all the fabrics accessible for a make, model and year and you can utilize the different fabric types to assist you with getting a best choice you are looking for. Remember, that occasionally the factory-original cloth may even be a step lower in quality and cost than few of the premium, aftermarket options accessible for some soft-tops. With the best material your convertible top will last long.

Brand

Another way to make your choice better within a budget when you change your convertible top is to choose a brand that provides best convertible tops on less expensive price. This type of company utilizes some differences in the manufacturing process and sourcing of materials to save cash that they pass onto the customers. Replacement convertible tops at this budget price point actually come with a warranty that is like premium brand replacement soft tops and remember that it will be your best choice. You can also find other best choices in budget-saving brand.

Reusing Hardware and Accessories

Convertible tops not only require the material for the top, but also the cables, frame and pads. If you want your choice to not be bad when it comes to your change in convertible top, then re-utilize your old components when possible since you know how good those are. So, you should examine whether they are in good enough shape to reuse. Never reuse any parts that have sustained water corrosion or damage. Speaking about the convertible top frame, it is often quite re-usable.

In the event that it is distorted or bent in any way or doesn't raise or lower properly, at that point you may check with your installer about the need to replace your convertible top frame or repair it. Most vehicles don't need convertible top frames to be replaced in their project. Between the new convertible material and your convertible top frame, there are convertible top pads, which protect the material from friction harm when the top is raised or brought down.

If you are really want your choice to be better on a budget and if these pads are not damaged and worn thin then you re-utilize these to save some cash. Side-tension cables help the convertible top to raise and lower in a perfect and smooth way. In most cases if your top is opening and closing perfectly and not sagging or leaning aside, then your side-tension cables are likely in a good condition. Take care not to harm them during removal and inspect them for water harm.

Installation

In this generation where internet has become a necessity, there are quite a few resources accessible to toolbox wielding auto owners who are familiar with DIY. As a car owner, you probably know that convertible top installation is one of the hardest installation tasks that you'll run into with your vehicle, so it is highly recommend leaving it to experts like convertible top remover. They are professionals and can save you from a devastating mistake that may end up damaging the top or causing an expensive leak that require repair on your convertible interior. If you want to install your convertible top yourself then simply be careful and do it appropriately. If you face any problem then you simply have the option to seek the help of professionals.

If your convertible top needs a replacement then all you have to do is research the available tops in the market and make your choice. Making your choice doesn't simply mean buying any random convertible top to change your old one, you need a proper information related to convertible top in order to not regret your decision.

Saturday, March 13, 2021

How to protect motorcycle seat from sun?

 Maintaining your motorcycle can be somewhat troublesome task since it requires a proper care on your part. In any case, what might be said about the preventative maintenance many people probably won't think about that could be affecting their motorcycle? Your motorcycle can get damaged by simply not remembering or ignoring certain part of it. A lot of people don't understand the effect certain weather can have on a motorcycle, regardless of whether it's a nice and sunny day.


In all honesty, the sun can really have a major affect on a motorcycle. It is alright to leave your motorcycle out in the sun. On the off chance that your motorcycle is left out in the sun for long periods of time on a regular sun, the UV rays from the sun can start harming the seat and any plastic or rubber just as well as affect the fuel inside the motorcycle.

At the time when the sun is out, many motorcycle`s owners get motivated to pull their bikes out and go for a ride. Knowing the effects the sun has on a motorcycle is crucial so you can better understand how to care for your motorcycle and prevent any harm to it. Many motorcycle owners don't understand that the sun can harm their motorcycle seat even when it`s not a hot day. However, it takes a consistent amount of exposure for the sun to cause such harm, yet it happens in any case.

To start with, in case you're motorcycle is regularly stored inside a garage, shed, or someplace similar to that and you've taken it out for a couple of hours or parked it in a parking area for some time directly under the sun, your motorcycle is likely okay. Occasional exposure to the sun won't hurt your motorcycle seats. Your motorcycle seat gets affected by the sun when it's constantly expose to the sun, which means you have it stored or parked outside as it's permanent parking area.

Your biggest worry with any motorcycle seat`s fabric is the harm done by the UV rays from the sun. UV rays tend to break down the elements in your motorcycle seat pretty quickly. So when you leave your motorcycle out in the sun constantly, you'll probably have to end up getting new seat sooner than you thought.

Some of you have no choice but to leave your motorcycle stored outside whether it's the summer or the winter usually because there`s no garage or shade accessible. Lots of motorcycles owners have experience this kind of situation. In the time that you need to keep your motorcycle outside, or if your motorcycle is your main source of transportation and you need to keep it parked in plain sunlight, there are a couple of things you can do to protect motorcycle seat from the damages caused by the sun.

The first and clear solution is to find a parking area that is generally under shade. It's quite amazing how much a little bit of shade can take care of your motorcycle.

In case you're parking in a parking lot, you may need to go out of your way a little and walk an extra distance to do this, however it'll save you cash in the long run. Likewise accessible is something many refer to as a motorcycle seat cover. This is a covering you can put over your seat that will not only guard it from the UV rays from the sun, but it also has deflectors that keep the heat away which causes your seat to damage or crack.

When it comes to your seat, you should consistently utilize a leather conditioner and clean it about once every week on the off chance that you constantly keep it in the sun. The cleaning and conditioner treatment will help it with persevering through the UV rays beating down on it during the day. Make sure to regularly clean your motorcycle seat and even wax the tank. The heat from the sun can cause a lot of dirt, oil, grime, or grease that may have gotten on it which can be hard to remove later. This will likewise protect the cover from rubbing on anything and scratching it.

Routinely condition the seat if it's real leather or not. Regularly inspect the seats and ensure that there aren’t any cracks forming. To wrap things up, ensure there is a cover over it any time you are not utilizing it. In the event that you are going to own a motorcycle, you need to ensure it has a decent cover to protect it from the elements whether that be rain or hot sun.

Actually the best way to protect your motorcycle seat against the sun is to just put a cover over the entire seat. This can be a bit of a stressful if you’re constantly out and about with your motorcycle and need to put a cover on and take it off after your use.

Not to mention carrying it around when you are riding to your destination. In any case, motorcycle seat covers give truly necessary assurance to motorcycle and will prevent every harmful effect from the sun.

On the off chance that you take care of your motorcycle seat properly, it will provide you a comfortable ride. If you notice any cracks or harms in your seats, quickly get new ones and contact a professional specialist for repairing your motorcycle seat. Any harm in your seat can possibly cause you an uncomfortable experience while you're out riding which can be potentially dangerous.

Saturday, January 30, 2021

How to store boat safely in winter

 On the off chance that your boat is damaged or harms, you may have thought about repairing it yourself or using the help of professional services instead like the company offering boat covers in Oshawa, Ontario. These are good choices to have if your boat is harmed, but what do you do throughout the winter months on the off chance that you already own a boat? If the weather is cold, you really need to take a lot of precautions to protect your boat.

Storing your boat safely during winter isn't as simple as towing it out of the lake and moving it onto your yard. In winter conditions and long periods of storage, your boat can experience a lot of wear and tear. It can likewise lead to serious and expensive repairs once spring and summer come around. These are only a couple of the things you should consider when thinking about boat storage.

In the event that you follow these steps, your boat will be perfectly stored and you will be ready to utilize it again.

To appropriately store and protect your boat for the winter, follow these steps:

·        Utilize a Cover

 Cover your boat to keep it away from moisture and dirt. Covering your boat will guarantee that it will be all set and ready to go when the warmer months are back.

·        Change oil

Any liquid that leaks into your oil will harm the motor, so, changing the filter and flushing out of the oil is essential so that there will be no liquid residue. New oil should be added in after flushing the old oil out.

·        Spray fogging oil

You should spray fogging oil over the spark plug opening or on your boat's carburetor (look into your manual for guidance). Doing this will make your motor's mobile parts safe during the cold season.

·        Lubricate the Steering Device

Lubricating the steering and other control gadgets will guarantee that these will move effectively when it's time for you to take your boat out and have some water experiences. Make sure that the creases are covered sufficiently with lubricate and oil.

·        Replenish the coolant

Get rid of the current coolant and afterward flush it with water. Fill with fresh antifreeze to prevent parts of your motor from freezing and to shield them from weathering.

·        Take out the Drive Belts

When held under rigidity for a long period of time, your drive belts may break under the pressure. Thus, it is highly recommended to release or to take out the drive belts totally before to placing your boat in storage.

·        Disconnect the Battery

Try not to let your battery to deplete and discharge over the wintertime. Separate the battery and load it with refined water. Charge the battery frequently to know if it's perfect to utilize when you attach it back to your boat.

·        Fill the Gas Tank

To avoid getting harm in your gas tank, you should fill it with gas. Note that buildup can create in an unfilled tank, along these lines, damaging the tank if the moisture freezes. Gasoline additive will guarantee your gas is ready to utilize if it's time to use again.

·        Focus the interior

Devices are in danger during extremely cold conditions which is the reason you should remove them in your boat throughout the winter season. Electronics as well as organic materials, for example, canvas, leather, and fabric materials should be removed as well. Moisture can create mold and mildew on these things. You should likewise drain the water tanks, and pour antifreeze through the water pipes.

Inappropriately storing a boat throughout the winter can likewise lead to mold as it is exposed to the rain, hail, sleet, and snow. Another common issue is pests who make your boat their new home and may bite up the motor interior and wiring. Storing your boat safely is unquestionably possible for your boat during winter. If you choose to do this, it is very crucial to pull your boat completely out of the water since cold and ice water can damage your boat. If you decide to store your boat safely, think about the following factors-:

Boat Wrap is the best choice

Like a vehicle, it is good to put a cover on your boat to protect it from air and dust, yet that is not actually enough. It is a far better to get some boat wrap from the company offering boat seat covers in Oshawa. Boat wraps give your boat more assurance against cold and harsh weather.

Lock It Down

In the event that you intend to store your boat for long periods of time, it needs to be ready for strong winds, snow, ice, and hail. This is particularly true on the off chance that you are covering it somewhere off your property since you can't monitor it as often. Likewise, remember that thieves frequently try to steal boats in winter, so you need to consider security as well.

Make the Boat Well-Drained

In the event that you don't allow water to drain out of your boat, this can cause huge problems in winter. If water inside your boat gets in the stabilizer or if your motor freezes, you are in for trouble after the winter. Before you store your boat for the winter, always make sure fuel lines and other defenseless areas are completely dry and drained.

A Storage Facility

Boats are your precious investment so you must be certain you protect them. All the steps mentioned above are useful, yet they actually don't ensure that your boat will escape from the cold weather completely. You might need to consider indoor boat storage in a facility. This can sometimes only cost few amount of money and it likewise saves you the stress of completely winterizing your boat. It is a simple option, especially in the event that you live somewhere with harsh winter weather.

By keeping these above factors in mind you can appropriately store your boat outside in winter.  If you need any help during the process of winterizing your boat you can simply contact the company offering boat seat repair in Oshawa, Ontario. With the help of expert, it is likely that storing your boat will be successful without any issues.

Thursday, January 21, 2021

How to keep boat cover safe in winter

 On the off chance that you've have enjoyed the summer with your boat, now might be a perfect opportunity to begin thinking about storing your boat for the winter. At the time when winter comes, you need to ensure you have your boat or pontoon covered and prepared to face the winter season. So, for your boat to be able to function properly after the winter season you need to protect it with boat covers. Regardless of whether you're a new boat owner or a professional boater, storing your boat appropriately throughout the winter season ensures it'll be ready to go when the pleasant, warm climate returns. Not winterizing your boat can easily cost you a lot of money since it can harm your boat. There is a clear statement that boat damage claims to increase during the off season. Not winterizing your boat can cause crack on engine block which is a costly part to replace. Without a cover, water can get in place, expand and freeze. This will cause damage to the pipes, fiberglass and engine. Any harm or damage might be seen unexpectedly once the boat is removed from the water. Or on the other hand, inappropriate storage throughout the winter months could lead to costly damages. Winter Boat covers in Oshawa Ontario are an affordable protection measure. The first thing to do in winterizing your boat is cleaning and performing necessary maintenance. When your boat is prepared, you need to follow the process carefully to properly cover the boat for winter.

There are two main and best options for boat owners with regards to covering their boat for the winter.  Canvas and plastic covers are ones that boat owners can secure themselves.

Plastic coverings are the least expensive choice for a DIY boat cover. A boat covers additionally has the most potential to cause harm. These coverings have metal grommets that can work on a boat's gel coat. They are additionally more challenging to secure tightly. Any movement and flapping will cause friction. This friction will erode at your boat's clear coat. Expect to get one or perhaps two winter seasons out of the plastic boat cover. The winter climate will wreak havoc on the plastic boat cover.

Custom canvas coverings are heavy, exceptionally heavy. They are likewise costly. You can purchase a standard-sized version or custom-made. This implies they secure firmly for minimal movement.  The sun and shar edges are a canvas cover's worst enemy. The sun's UV beams make the material powerless and weak.  The sharp edges cause friction. In case of a tear in the canvas, you can fix it. The price of canvas repair is less expensive than purchasing a new cover each year.

If your boat got the protection of a boat cover, then your boat can function properly for a long run. But, your boat cover also needs a proper care otherwise it will tear or get damaged in a short period of time. So here are some tips to keep your boat cover safe-:

Clean your boat cover regularly

To keep your boat cover looking it`s best for the long-term, regularly brush off any loose dirt with a soft brush and rinse with tepid water. To clean, a solution of mild natural soap and lukewarm water might be utilized. Wash thoroughly and allow to air dry. The utilization of cleanser isn't suggested as it might decrease the water repellent finish on specific fabrics and invite the growth of mildew. It is highly suggested to utilize 303® Marine Multi-Surface Cleaner to securely remove dirt and other difficult stains.


Avoid sharp edges


Search for any spot where there is a sharp edge or corner. These pressure points will wear on your boat cover quicker than anywhere else. Place a support between the boat and your covering. You can utilize an old piece of rug or clothes. Make sure to secure the cushion so it will remain in place for the whole winter season. Give special consideration to antenna mounts, burgee poles, and windshield corners. These will in general be the most common areas for creating tears in a canvas or plastic boat cover.


Avoid environmental harm

Keep your boat cover free from any environmental factors, for example, leaves, limbs and different particles that could burden your cover or harm it with tears and scratches. At the point when leaves and different particles bed on your cover they are inclined to weigh your cover down, causing stress, however they can likewise cause mold and mildew issues. On the off chance that you do encounter mold and mildew on your cover, you can clean it with a pressure washer on a low setting with soft bristled brush and a mild detergent. But do not put your cover in a washing machine of any kind.

With the above mentioned tips you can protect your boat cover throughout the winter season. And likewise the boat cover will protect your boat during winter. Winters can be a beautiful season, but they can cause harm on your boat's interior in the event that you neglect to take the right precautions. With winter practically around the corner, don't wait too long to make sure your boat is properly protected by boat cover in the coming cold season.  Covering your boat by boat cover when it isn't being used will guarantee it remains in the stainless situation at all seasons.  Winter season is also no exception. Boat will be protected from scratches, dirt, and grime which can occur during winter season. Boat covers are a basic boat accessory and an incredible choice to protect your happiness and satisfaction. In this way, you should utilize a boat cover while placing your boat into winter storage. While choosing among the boat covers for the winter, know how secured your boat need to be. At that point figure out what sort of cover you can afford. Boat covers from the company offering Seat covers in Oshawa Ontario are a reasonable necessity for any boat owners especially in winter season.